Reporting
Table of Contents: |
|---|
Overview
Located under the REPORTING menu heading, Reporting Center: Enhanced Reporting replaced BankNow Special Service (BNSS) Enhanced Reporting in May 2026.
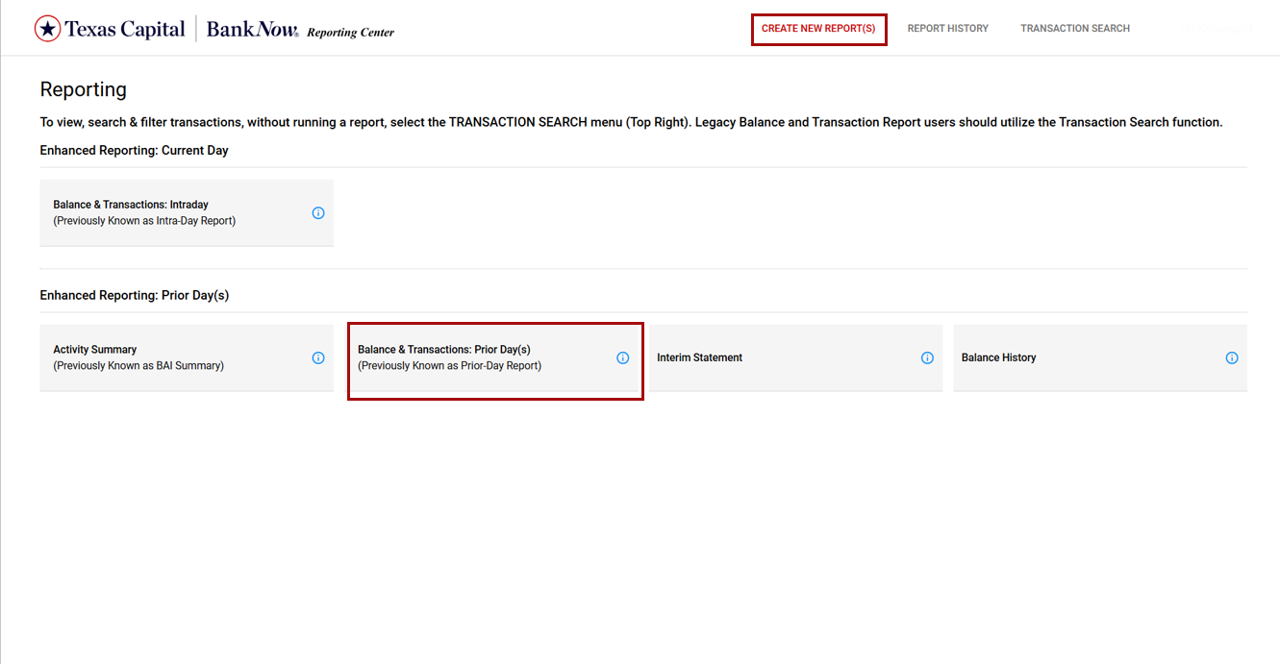
The five Ad-Hoc Report equivalents can now be found in Reporting Centers’ CREATE NEW REPORT(S) and REPORT HISTORY pages. Where report names have been changed, the old name is referenced for convenience.
| Old Name | New Name |
| Ad Hoc: Intra-Day Report | Balance & Transactions: Intraday |
| Ad Hoc: BAI Summary | Activity Summary |
| Ad Hoc: Prior-Day Report | Balance & Transactions: Prior Day(s) |
| Ad Hoc: Interim Statement | Interim Statement |
| Ad Hoc: Balance History | Balance History |
Functionality from the Balance and Transaction Report and the Item Search Utility have been merged into the new TRANSACTION SEARCH page.
The standalone Template function is no longer required as all report instances are saved for future use. BNSS Enhanced Reporting templates will therefore not be migrated.
Report Creation
On the landing page, users can select a report tile and follow the wizard to define the run criteria. The criteria are automatically saved to simplify future use.
An information icon (i) provides a brief description of the report’s intent.
Each report wizard will be reflective of the report. For example, there is no date selection element on the intraday report (as it can only return intraday data).
Once all sections are complete, the CREATE + CREATE & RUN buttons will activate. CREATE & RUN is the default selection, as this will be used most frequently.
All date options (other than Custom Date) are dynamic, meaning if the report is re-run in the future it will reflect the date rule as of the time of running. In simple terms, a Current Month to Date report returns more data on the 20th of the month than it does on the 2nd.
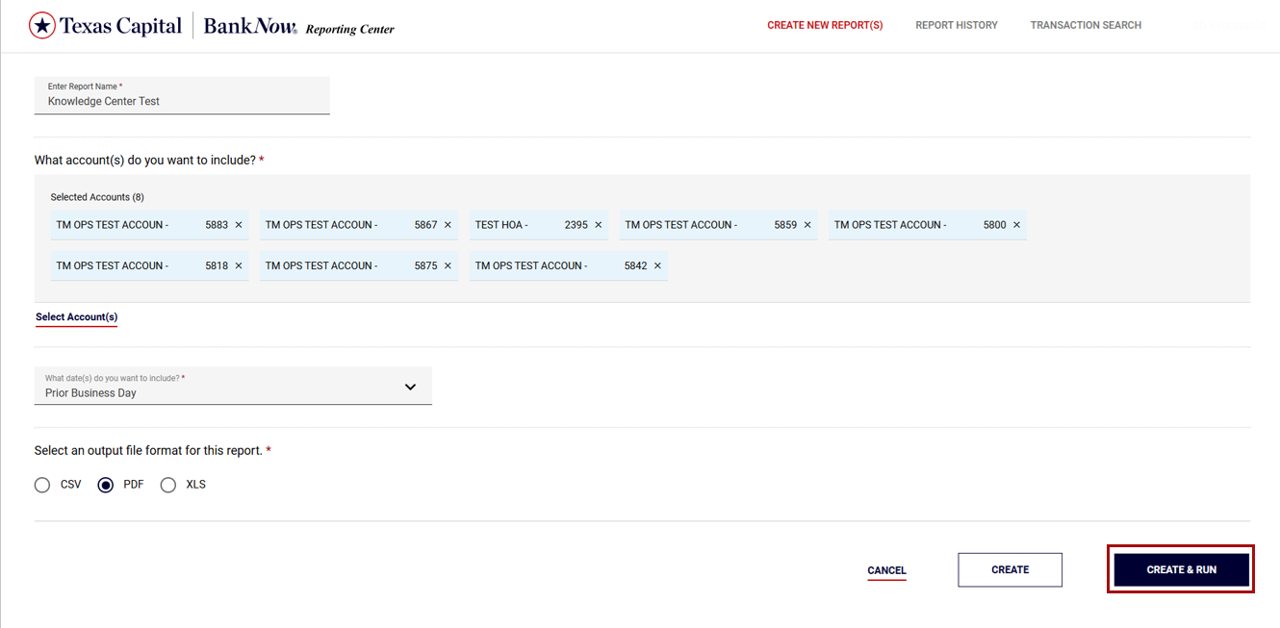
Once CREATE & RUN (or CREATE) is selected, the user is automatically directed to the REPORT HISTORY PAGE.
Report Viewing
When a report has finished running, its status will dynamically update to Completed; there is no need to refresh the page or browser.
Select the appropriate download link to view, print or save a report.
Each row on the REPORT HISTORY screen relates to a unique set of report criteria, not a report instance. To drill through to the full history, click the action icon on the far left of the row and then select View History.
Action Options Available
- View History. See all previous versions of the report.
- Run Now. Re-run a new version of the report.
- Clone/Edit. Use this to simplify the process of creating multiple reports with very similar criteria. For example, the same report input criteria, but different output formats.
- Delete. Permanently deletes the report instance and any history.

Future Proofing.
Several options have been added to assist users as more reporting modules are added.
- Favorites. Select the star and then use the slider top right to switch between viewing all report instances or only favorites.
- Search. Easily find a specific report amongst a large list.
- Filters. Only show reports with specific criteria.
Transaction Search
- Simply select one or many accounts, confirm date parameter and all matching transactions are immediately returned.
- Default return is all applicable transactions. Use the drop-down on the right to focus on a specific transaction type.
- The Action link (far left of row) enables user to drill into additional details (where available), such as check images & ACH batch detail (offset info).
- Results can be exported in PDF and CSV format for further analysis / record keeping. Note. The exports will include all returned transactions, not just what’s visible on screen.
- Note: The exports will include all returned transactions, not just what’s visible on screen.
- An Account Summary Card is provided top right. One account is shown at a time, swipe through to see more.